Wednesday, February 23, 2011

Slow Cooker Pot Roast


Perfect meal for a cold day. Easy meal for a busy-busy day. Low-cost meal when roast and/or veggies are on sale. All around - a classic, delicious, perfect meal. Enjoy! :)

Slow Cooker Pot Roast
8 servings
Prep time: 10 minutes
Cook time: 8 hours (at least)

1 Tbsp oil (or spray with nonstick cooking spray)
3 - 3 1/2 lb boneless beef pot roast - rump, chuck or round
4 carrots, sliced (or a 1 lb pkg baby carrots)
4 medium potatoes (about 2 lbs), cut into 1-inch pieces
2 envelopes onion soup mix
3/4 cup water (I prefer to use beef broth. I pour the extra from the can into the bottom of the crock pot)

If making gravy from crock pot juices/liquid:
1/4 cup water
2 Tbsp all-purpose flour

  1. In a large nonstick skillet, heat oil over medium-high heat (or spray with nonstick cooking spray). Brown roast on all sides.
  2. In slow cooker, place carrots & potatoes. Top with browned roast. Set aside.
  3. In glass measuring cup, combine onion soup mix and water. Add to skillet, scraping up any browned bits from the bottom of pan. The mixture will thicken & bubble.
  4. Pour soup mixture into slow cooker, over the roast.
  5. Cook covered on LOW 8-10 hours or HIGH 4-6 hours.
  6. Remove roast & vegetables; place on serving platter. Trim roast into serving-size pieces, if desired.
  7. To make gravy: Pour liquid/juices from the slow cooker into a medium saucepan. Turn heat to medium-high.
  8. In a separate bowl, thoroughly combine 1/4 cup water and 2 Tbsp all-purpose flour. Add to liquid in saucepan.
  9. Whisk flour/water mixture & liquid/juices until combined. Continue whisking & bring to a slow boil. Heat until thickened, about 5 minutes.
  10. Pour gravy through seive (if desired) into serving dish.

We like to serve this with fresh breadsticks. Hope you enjoy it!


lil luna link party button
We just linked up our Chicken and Capers recipe with Lil Luna. Go check out what others are sharing.

Tuesday, February 22, 2011

Small-fry Frittatas


These frittatas are like mini-omelets. Basically scrambled eggs, baked in muffin pans, and with custom add-ins. My family's reaction: "so cool!" "spectacular" "definitely a KEEP!" I like those responses to a new recipe! :)

The add-ins are completely up to you. After you mix the basic recipe & fill the muffin cups, you can add whatever you have on-hand or whatever suits your tastes. You can even customize each family member's meal (if you have the time) - they can choose exactly what they want in their frittatas.

Great meal to get kids involved in the cooking process.

Small-fry Frittatas
adapted from a recipe originally printed in Family Fun Magazine

8 large eggs
1/2 cup half-and-half
1/2 tsp salt
Assorted add-ins (see below for ideas)
Grated Parmesan cheese, if desired

  • Preheat your oven to 350*F. Coat a 12-cup muffin pan with nonstick cooking spray.
  • Whisk together eggs, half-and-half, and salt in a medium bowl, then fill each muffin cup about 1/2 - 2/3 full (be sure to evenly distribute the egg mixture).
  • Add about 2 Tbsp add-ins, if desired, to each cup, then sprinkle on a bit of Parmesan cheese, if desired.
  • Bake the frittatas until they are puffy and the edges are golden brown, about 20-25 minutes. Don't take them out early or they'll be gooey in the middle.
  • If necessary, run a butter knife around the edge of each one to loosen them before removing them from the pan.
  • Serve & enjoy!!

Add-ins:

shredded cheese, diced veggies, cooked & chopped bacon, ham or sausage, spinach, green onions, etc... You're only limited by your tastes & imagination. It's a great way to use leftover veggies & meats.

** Be sure any meat products you use are pre-cooked. This baking process will not cook meat through.


Monday, February 21, 2011

Turkey, Bacon & Avocado Sandwiches on Ciabatta


This is the best sandwich EVER - from Kneaders Bakery & Cafe, here in Utah. I love them. They're huge, fresh, delicious, and I'm not above asking my husband to pick some up on his way home from work!

But then I figured, as good as Kneaders is, I could probably make this at home. So I did! :)

Definitely pick up the ciabatta bread - it makes this sandwich really special. Definitely use fresh or leftover turkey (especially if you've made this) and not deli meat. It's SO worth it!

We make these the day after Thanksgiving and whenever I bake or crock-pot a turkey breast, I save leftovers to make these sandwiches.

Enjoy!!

Turkey-Bacon-Avocado Sandwiches on Ciabatta

Use leftover turkey, cooked bacon & sliced avocado on sliced ciabatta bread.
Trim with provolone cheese, fresh lettuce & tomato, thinly sliced red onion, and a 1-1 mixture of your favorite mayo & spicy mustard.

SO yummy!

Friday, February 18, 2011

The White House Chef's Turkey Patties


This recipe for Turkey Patties is from an article in Family Circle magazine found here. It was created by White House Executive Chef Cris Comerford as part of the "Let's Move" initiative.


The benefits to these patties are first, taste - SO delicious! Second, lower in calories & fat than traditional turkey patties. Third, they're super easy to make.

I used traditional plain breadcrumbs since I didn't have any Panko crumbs on-hand.

My family declared this recipe: "a definite KEEP!"

The White House Chef's Turkey Patties

  • 1 lb ground turkey
  • 1/4 cup panko crumbs
  • 1 egg white
  • 2 Tbsp minced scallions
  • 1 clove garlic, minced
  • 2 Tbsp low-sodium soy sauce
  • 2 Tbsp chopped fresh parsley (if you use dried, check the package to figure out the proper amount to use)
  • Zest & juice from 1 lemon
  • non-stick spray
  1. In a large bowl, combine ground turkey with panko, egg white, scallions, garlic, soy sauce, parsley, lemon zest & juice. (I'd do this with your hands so you don't break down the meat too much. If you break ground turkey down too much, it becomes grainy.)
  2. Shape into 4 equal patties.
  3. Spray large skillet or grill pan with non-stick spray. Heat over medium heat. (Don't put patties on a cool skillet. Make sure the skillet is fully heated before placing the patties.)
  4. Cook turkey patties for about 5-7 minutes on each side or until cooked through.
  5. Serve.

We had these with rice pilaf & veggies.

Enjoy!


Thursday, February 17, 2011

Stromboli


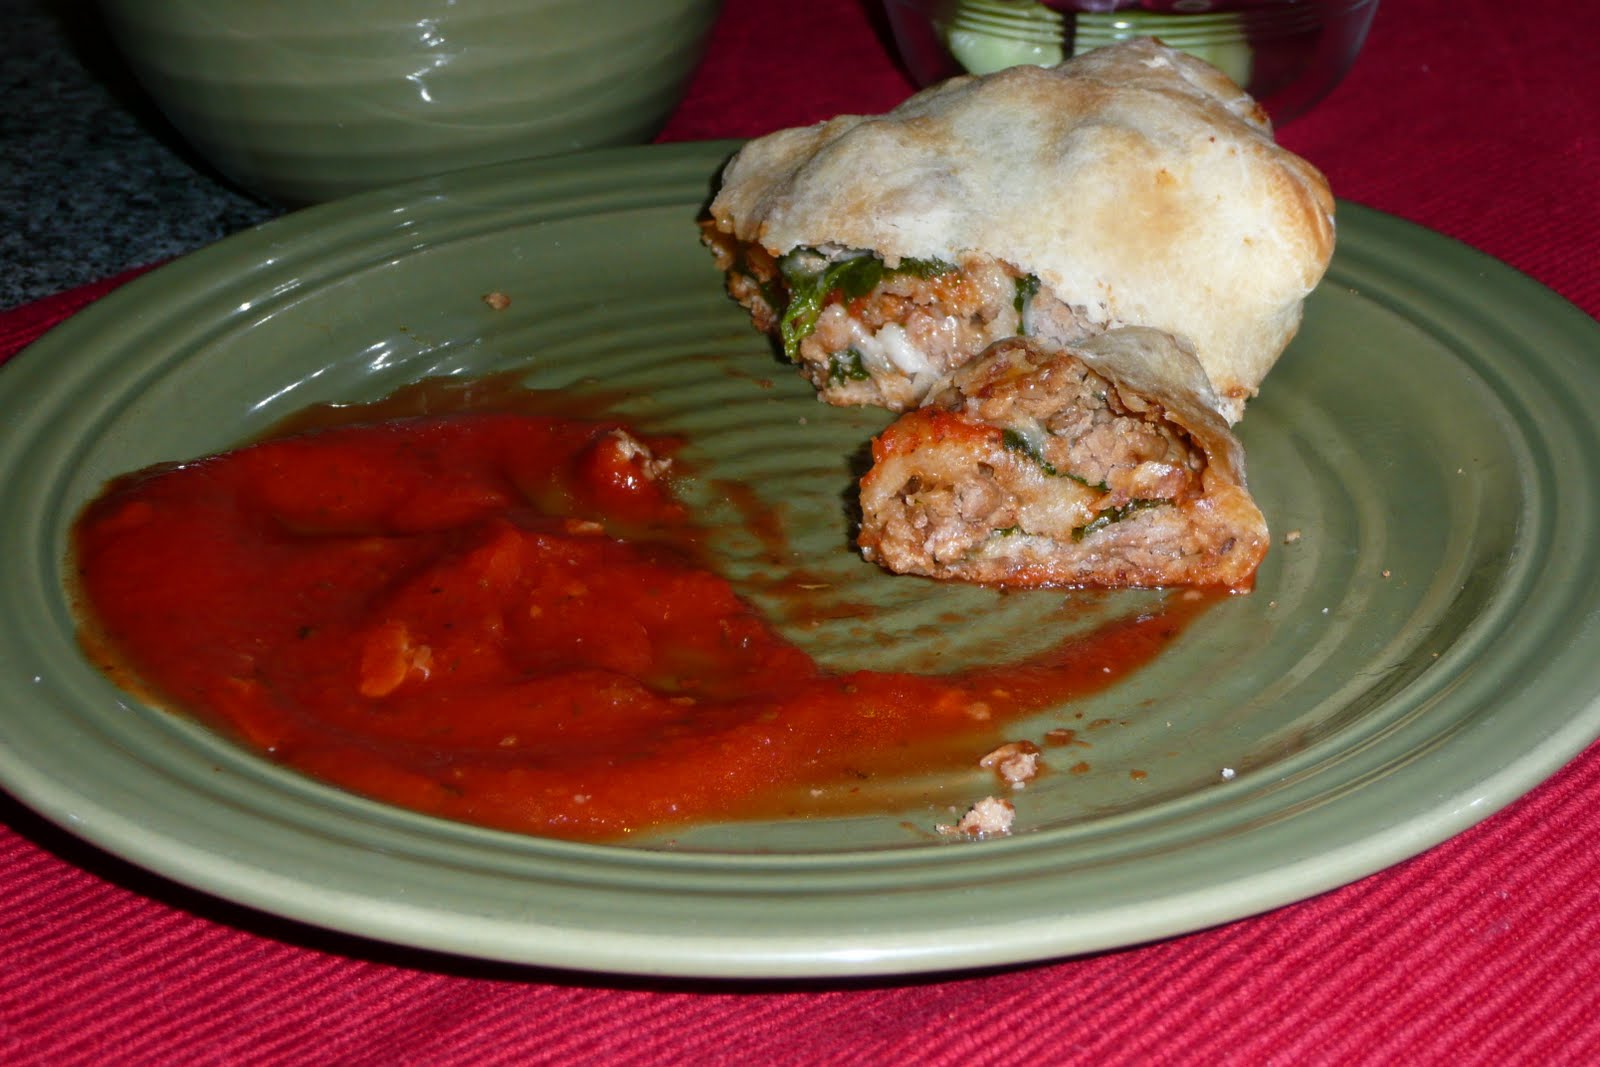
Tonight I made stromboli for the first time - this is a meal I'll definitely make again! :)

The fillings are completely adjustable to fit your tastes & what you have on-hand. I'm sure you could use different sauces, veggies & meats, but traditionally a stromboli is an Italian food. So you begin with pizza dough, mozzarella & marinara sauce. What you add after that it totally up to you!

My recipe was adapted from the first recipe I saw in Martha Stewart's "Everyday Food" and then adjusted to match what we had on-hand.

Here's what we had tonight...


STROMBOLI for 6

2 canisters pizza dough, like Pillsbury - or 1 1/2 lbs prepared pizza dough, thawed if frozen
all-purpose flour for work surface
1 1.25lb package ground turkey
1 1/2 tsp Italian seasonings
1 tsp minced garlic
2 cups grated mozzarella cheese
1-2 cups marinara/spaghetti sauce (your favorite)
1 cup spinach
Marinara sauce for dipping
  • Preheat oven to 400*F. Line a baking sheet with foil. Spray lightly with non-stick spray.
  • Brown ground turkey mixed with Italian seasonings. Remove from heat & stir in minced garlic. Place on hot pad/trivet near your prepared work surface.
  • On a lightly floured work surface, divide each canister of pizza dough into 3 pieces. (I rolled it out horizontally & fairly flat, then pulled it just a bit to make it fairly even.) Cut it into thirds with a pizza cutter. Stretch out each third to about a 6" x 8" piece. Let dough rest briefly if it keeps returning to it's original size/shape.


This picture shows 1 piece of dough (left) pulled out, 1 piece (top) with fillings sprinkled on, and 1 piece (right) rolled & ready to move to the foil-lined pan.

  • Divide cooked ground turkey evenly into 6 portions. Scatter ground turkey over dough, leaving 1/2" margin. Lay spinach leaves on top of meat. Sprinkle mozzarella & marinara sauce on top.
  • Starting at one end, roll up each stromboli. Pinch the seams & ends gently. You don't need to completely seal it. Don't panic of the pizza dough tears slightly or holes open up. You can pinch them shut or, if they're small, leave them for venting while it cooks.
  • Place on foil-lined baking sheet, seam side down. If no holes have formed in the pizza dough, use a paring knife to cut 2 slits in the top of each stromboli.
  • Brush very lightly with olive oil.
  • Bake until golden, about 20-25 minutes.
  • Serve with 1/2 cup marinara sauce for dipping, if desired.


We paired this with a spinach & arugula salad.


It took longer than I expected to prepare & roll each stromboli. My dough was a bit too thin & popped open a lot while I was rolling. But they came out beautifully & were absolutely delicious!

Some variations I found online, all with mozzarella & marinara sauce:
canadian bacon, pineapple
broccoli, halved grape tomatoes, salami
Italian sausage or chicken sausage, spinach


Some additional variations:
alfredo sauce, shredded chicken, Parmesan
pesto, shredded chicken, mozzarella


Cake Mixes - Regular vs. Low Fat Recipe

Have you seen the "Lower Fat Recipe" on the back of your boxed cake mixes? Have you ever wondered if they'll still taste good? If the changes are really worth it?

I have! So today, I decided to try one out.


I used a Duncan Hines Red Velvet cake mix and followed the directions on the box for the Lower Fat Recipe. I also had to do the noted adjustments for High Altitude since I live here in Utah.

But will it be worth it?


I know this isn't a great picture, but I found the statistics pretty interesting...

Each serving is listed as 1/12 of a cake. For cupcakes, I just multiplied their numbers by 12 (12 servings total or 1/12 twelve times). When I had the total for the whole cake, I divided it by the number of cupcakes I made. Since I was doing the high altitude adjustments, I got 30 cupcakes from this mix.

The Lower Fat Recipe calls for 1/3 cup plain applesauce instead of vegetable oil, 1 cup of water instead of the usual 1 1/2 cups, and the eggs (3) stayed the same.


This is the applesauce I used. My son was recently diagnosed Type 1 diabetic so we have loads of No Sugar Added products on-hand, like this Mott's Applesauce.

The total calories went down from 250 to 200 when using the Lower Fat Recipe.

The total fat went down from 12g to 6g (saturated fat from 3g to 2g, polyunsaturated fat from 5g to 1g, and monounsaturated fat from 3g to 1.5g)

Cholesterol, Sodium, & Protein stayed the same.

Total Carbohydrates (this is what we need to know for my son's diabetes) actually went UP! From 33g to 34g - not much, but still surprising. The total sugars went up from 19g to 20g.


So for us, specifically my diabetic son, the regular recipe is actually better for his carb counts. But in view of total health, I think the cut in calories & fat is absolutely worth making the small changes and using the Lower Fat Recipe.


BUT - how did it taste? How did it look? That's what we really want to know, right?


Here's the finished cupcake with buttercream frosting & some red sprinkles. Beautiful!


And, for the sake of research (of course!), I took a bite so you could see the inside of the cupcake. It was moist & the flavor was perfect. I had expected to find a hint of applesauce-y flavor, but there was none. I also thought there would be a texture difference - nope!

My final verdict: Totally worth it for overall health (lower fat, lower calories). Not worth it if you're only concerned about carb counts.

But either way - super-duper yummy cupcake!


Monday, February 14, 2011

Chocolate Fondue


This was our fun Valentine's Day treat with the kids, but you could make it for guests or a fun date night dessert too.

I used these two recipes from bettycrocker.com:
Milk Chocolate Fondue
Dark Chocolate Fondue
to come up with the one I made tonight.


Here's the horrible (sorry!) picture of our treat:


It was delicious!! Even if you don't have a fondue pot, I think you could eat this right out of the saucepan - if you eat fast. :)


This dessert took less than 15 minutes to prepare. Enjoy!


Chocolate Fondue


2/3 cup half-and-half
12 oz semisweet chocolate chips or 2 cups (you could use another flavor of chips like white chocolate or milk chocolate - get creative!)
2 Tbsp half-and-half (or liqueurs, as the original recipes called for, but we don't drink alcohol so we used more half-and-half)
1 tsp vanilla
Dippers: Pound cake or angel cake cubes, marshmallows, mini sugar cookies, brownie cubes, strawberries, raspberries, blackberries, bananas, dried apricots, pineapple chunks, etc

  1. In 2-quart heavy saucepan, heat half-and-half and chocolate over low heat (very important so it doesn't burn), stirring constantly, until chocolate is melted and mixture is smooth; remove from heat.
  2. Stir in 2 Tbsp half-and-half (or liqueurs) and vanilla. Stir until fully incorporated & creamy-smooth.
  3. Pour into fondue pot.
  4. Spear dippers with fondue forks; dip into fondue.

If fondue becomes too thick, stir in a small amount of half-and-half.


Saturday, February 12, 2011

Whole Wheat Oatmeal Chocolate Chip Cookies


These are my mom's "famous" cookies. I've been making them since I was a child. They're also my family's favorite chocolate chip cookies. They're more fluffy & crunchy than soft & chewy. They're perfect for dipping in milk.

My dad & my sister like to flip them upside down & spread butter on them while they're still warm. I'm not into that so much...

Anyway, I like that they're made with whole wheat flour & oats.

Whip up a batch, pour a glass of cold milk & enjoy!!

Whole Wheat Oatmeal Chocolate Chip Cookies

Preheat oven to 350*F.

Cream together thoroughly:
1 cup vegetable shortening
1 cup white sugar
1 cup firmly packed brown sugar
2 eggs
1 Tbsp vanilla

Sift together:
1 1/2 cups whole wheat flour
1 tsp salt
1 tsp baking soda

Add sifted ingredients to creamed ingredients. Mix only until thoroughly incorporated.

Stir in:
1 1/2 cups quick oats
1 heaping cup semisweet chocolate chips
1/2 cup chopped walnuts (optional)

Drop by teaspoonful onto ungreased cookie sheets, about 2" apart.
Bake for 12 minutes. **
Cool & store in airtight container.
1/2 cup walnuts (optional)

** NOTE:
Baking time is approximate. Depending upon the oven & the weather, they could take from 10 - 14 minutes to bake. Keep an eye on your first batch, then bake the rest for the same amount of time.


GREAT idea from my co-blogger, Janis:
Just as a side note for those that like oatmeal raisin cookies like me, I add raisins instead of chocolate chips and add at least a tsp of cinnamon. Maybe more, I just dump stuff in. Yum! :)


Tuesday, February 8, 2011

The Emporium's Famous Sugar Cookies


I live in Lehi, Utah, fairly close to Thanksgiving Point. It hosts a dinosaur museum, Farm Country, art studio, movie theater and - especially great - The Emporium. It's a shop that makes me drool & wish I had a bigger home decor budget!

They also offer some amazing foods there (and cooking classes in their kitchens). One of the best things they have there are these sugar cookies.

I'm thinking they'd be awesome for Valentine's Day! If you have the piping skills, you can make them especially pretty.

Enjoy! :)


The Emporium's Famous Sugar Cookies

1/2 cup butter

1 cup sugar

1 tsp vanilla extract

1 tsp almond extract

1 egg

1/2 cup sour cream

3 1/4 cup flour

1/2 tsp baking soda

1/2 tsp salt


Cream butter & sugar together. Add egg, vanilla and almond extracts, and mix well. Add sour cream and mix until blended. Sift dry ingredients together. Add dry ingredients until blended. Wrap dough in plastic wrap and chill for 1 to 2 hours. Preheat oven to 375 degrees. Roll dough out onto lightly floured surface to about 1/8" thick. Dip cookie cutter in flour and cut out cookies into desired shapes. Bake on cookie sheets for 8 to 10 minutes or until edges are pale golden. Cool on wire racks.


Friday, February 4, 2011

What are capers?


I wanted to explain what capers are & what flavor they bring. It's good to know what you're getting into before you buy & prepare a new dish, right?

Here's the answer to "What are capers?" from foodnetwork.com ...


This didn't help me much...

I will say they are tiny, the texture of olives, and take on the flavor of the vinegar they're packed in. They are said to be salty, but I noticed the vinegar flavor more than the salt.

With the lemons, they add a balsamic vinegar-y flavor to this dish. Very pleasant & mild, not overwhelming. I think it's because the recipe calls for them to be rinsed before you use them. It removes most of the vinegar flavor. Kind of like the Tbsp of vinegar you add to potato salad. Not overwhelming, but it wouldn't be the same without it.

Hope this helps! - Kathryn

Thursday, February 3, 2011

Lemon Chicken with Capers


This is what I always order when I go to Buca di Beppo. It's DELISH!! Super easy to make, took me about 30 minutes total. I got chicken on sale for $1.49/pound so the whole meal was under $5 for my family of 6 - not bad!

Capers are usually sold by the pickles & olives. I found them at Walmart so they should be easy to find near you. Don't leave them out - they really make the dish!

We served this with fettucine & a green salad. I doubled the lemon/caper sauce & poured some over the hot fettucine and the rest over the chicken. You could also serve it with smashed potatoes or a loaf of crusty french bread.

Lemon Chicken with Capers

4 5-oz boneless, skinless chicken breast halves

salt & pepper

1/3 cup all-purpose flour

3 Tbsp butter

3 Tbsp vegetable oil

1/4 cup lemon juice

1/2 cup chicken broth

1/4 cup capers, rinsed

  1. Preheat oven to 225*. Line baking pan or jelly roll pan with foil. Place in oven.
  2. Sprinkle chicken with salt & pepper, then dredge in flour.
  3. Warm 1 Tbsp butter and 2 Tbsp vegetable oil in a large skillet over medium-high heat until butter foams.
  4. Add 2 floured chicken breast halves; cook until browned, 3-4 minutes. Flip chicken; cook until firm and browned on other side, about 3-4 minutes longer.
  5. Transfer cooked chicken breasts to baking pan in oven. Cover loosely with foil.
  6. Add 1 Tbsp butter and 1 Tbsp oil to the skillet and repeat steps # 2-5 with the remaining chicken breast halves. (Add butter & oil each time you add 2 more chicken breast halves)
  7. Add lemon juice & chicken broth to skillet and bring to a boil, scraping up browned bits from bottom of pan.
  8. Boil, stirring occasionally, until thicker - about 5 minutes. Remove from heat; stir in capers & 1 Tbsp butter. Stir until butter melts. Lightly season with salt & pepper, if desired.
  9. Remove chicken from oven & transfer to a serving platter. Pour sauce over chicken & serve.

Be sure to prepare your side dish while the chicken is cooking. Timing will depend upon what you're serving.

Prep time: 5 mins Serves: 4-6

Cook time: 20-30 mins, depending upon how many chicken breasts you prepare

Per serving: 387 calories; 18g fat (7g saturated fat); 122mg cholesterol; 1g fiber; 41g protein; 10g carbohydrates; 1010mg sodium


Monday, January 31, 2011

Crock Pot Pork Chops

**This recipe comes from http://www.thesweetslife.com/2009/10/crockpot-pork-chops.html It reminded me of a Teryaki and had good flavor. We served it with brown rice and salad**

Ingredients:
-6 boneless pork chops
-1/4 cup brown sugar
-1 teaspoon ground ginger
-1/2 cup soy sauce
-1/4 cup ketchup
-2 cloves garlic, crushed (I used minced garlic)
-salt and pepper, to taste

Place pork chops in crockpot. Combine remaining ingredients in a small bowl and pour over pork chops. Cook on low setting for 4-6 hours.

Taco Soup

**This is a soup my mom would make growing up. With all the yucky foggy weather we have been having lately, it was a great dinner.**

Taco Soup
1 pound extra lean ground beef
1/2 cup onion chopped
2 garlic cloves, minced (I use garlic from the jar)
1 14oz can beef broth
1 packet taco seasoning
1 14oz can diced tomatoes with green chiles
1 14oz can corn - drained (or you can use frozen corn)
1 14oz can black beans (or whatever bean you like)
1 14oz can tomato sauce (Optional..I have not been adding lately)

In a skillet brown the ground beef and onion together. Drain any excess fat. Add garlic. Stir until combined. Then add the taco seasoning packet and beef broth. Bring to a boil and then pour in to a medium sized stock pot.

Add the can of tomatoes, tomato sauce, corn, and beans. Stir well and bring to a boil. Then reduce heat to keep warm or serve.

Serve with sour cream, cilantro, tortilla chips etc.. or just eat plain. :)

Thursday, January 20, 2011

No Bake Cheesecake

**This is a recipe that my mom would make growing up. I love cheesecake, and I love how this is so so simple.**

No Bake Cheesecake

1 box Honey Maid graham cracker crumbs
**Follow the recipe on the back of the box for crust. You will need sugar and butter/margarine. I tripled the recipe, and put it in a 9x13 and did not bake it. You could also use 2 9" pie dishes.


2 8oz cream cheese
2/3 cup sugar
1 cup sour cream
2 tsp vanilla
8oz cool whip

Cream the cream cheese and sugar together. Blend in the sour cream and vanilla. When the mixture is mixed together well, fold in the cool whip. Pour into your 9x13 dish and chill for at least an hour before serving.

**The sauce on the top is a fresh blackberry puree mixed with a raspberry cake filling. I used half of a can of raspberry cake filling, and then I blended up about a cup of blackberries and added it to the raspberry cake filling. It was yummy!

LinkWithin

Related Posts with Thumbnails